How to create Database using cPanel
Database is an essential part in any modern website system. Any Content Management System like WordPress or Joomla needs a Database. Ecommerce Management Systems like Magento, Opencart, Prestashop, Zencart, osCommerce, Cubecart need a database for proper functioning of the website. Whenever we talk about Database never forget to backup your databases on a regular basis. In this article, we will go through two methods by which to create database in cPanel. The process is almost the same for any other hosting software.
Things we need – Keep the following things handy
- Database Name
- Database UserName and Password
- Database UserName Privileges (rights)
After you have got your suitable hosting plan you can log into your Just IT Hosting – My Account.
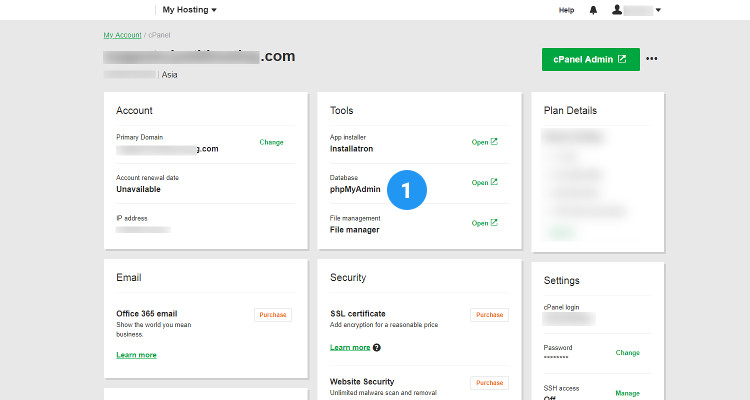
On the top right hand side under your Account name click on My Products. In the Web Hosting section look for your hosting account and click on Manage.
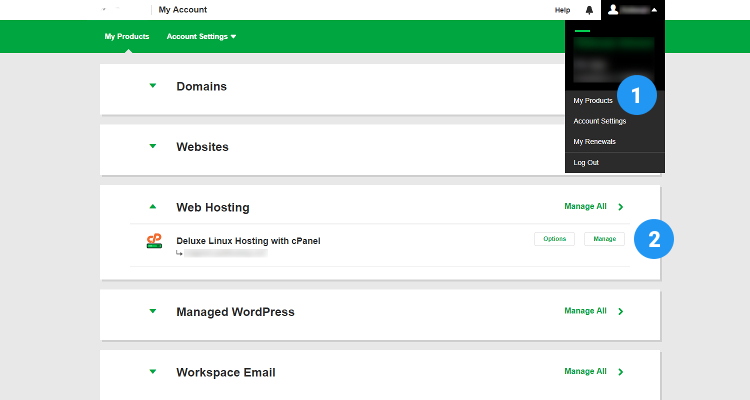
In the next screen click on the cPanel admin button this will take you directly to your cPanel hosting control panel
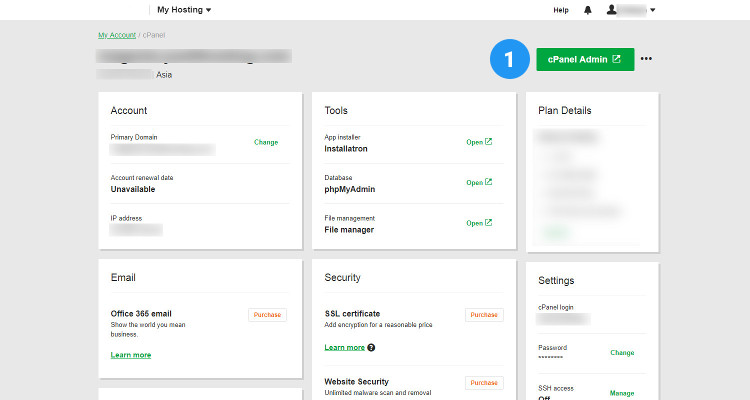
Moving forward there are two methods by which you can create your Db using the cPanel. One is the Wizard method and the other is the Step-by-Step method
Create Database using Step by Step method
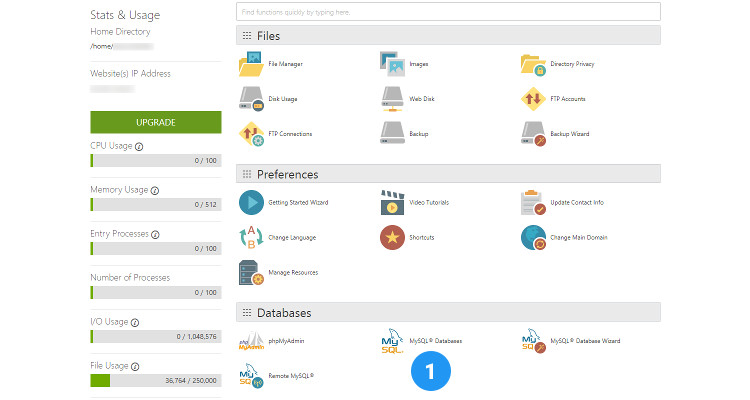
In the cPanel Home window, under Databases, click on MySQL Databases.
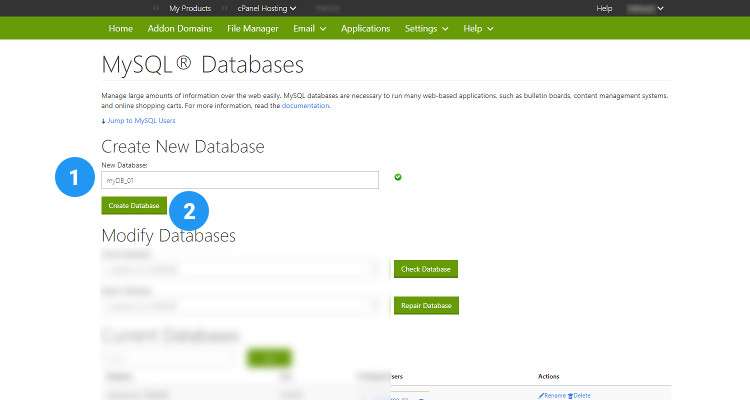
Under Create New Database, in the ‘MySQL Databases’ window enter a suitable name for your Db and click Create Database.
click Go Back
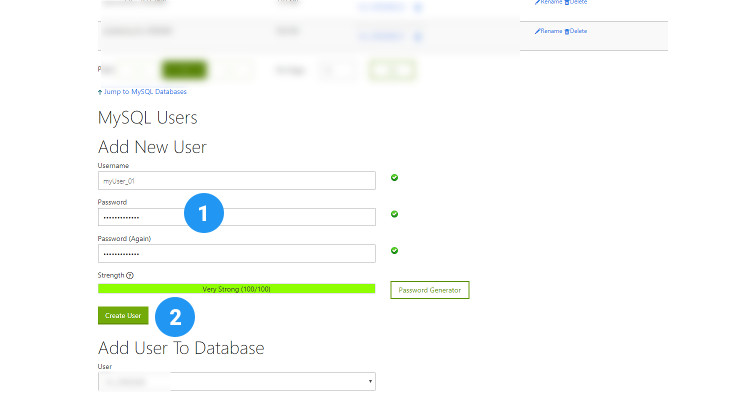
You will be returned back to the ‘MySQL Databases’ window again. In this window, under MySQL Users – Add New User enter a suitable Username and a password for your Db and click Create User.
click Go Back
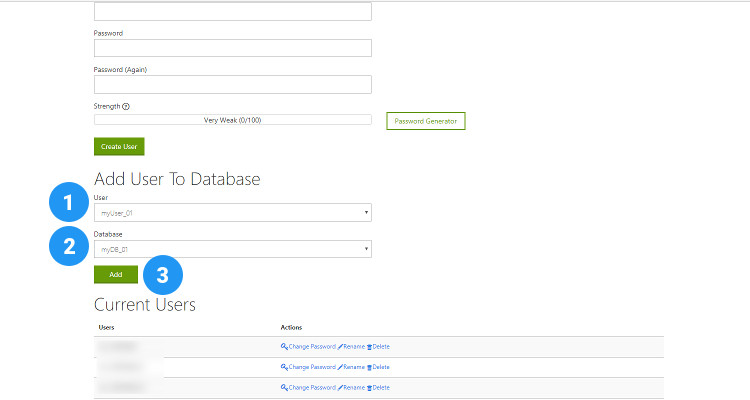
Back in the ‘MySQL Databases’ window again, under Add User to Database, select the User you just created and the name of the Database you want this user to manage and click Add
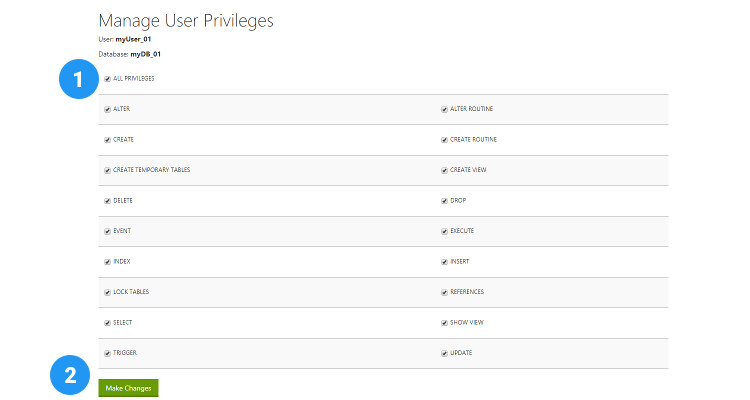
In the ‘Manage User Privileges’ section, click All Privileges to assign all database management rights to this user. Alternately, for security purposes, you can assign minimum privileges like Create, Insert, Update, Select and Delete just enough to manage your db.
Create Database using the Wizard method
This is a much simpler method :
In the cPanel Home window, under Databases, click on MySQL Database Wizard.
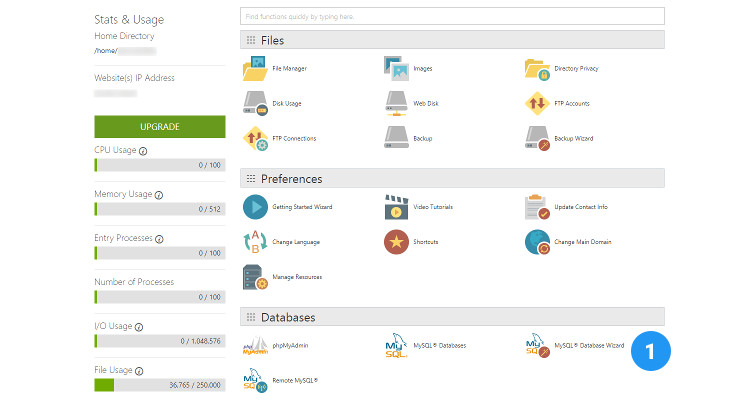
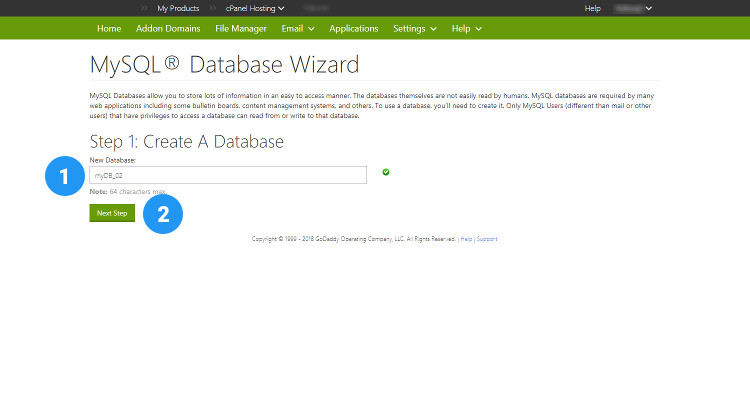
Under ‘Create a Database’ in the ‘MySQL Database wizaed’, enter a suitable name for your Db and click ‘Next Step’.
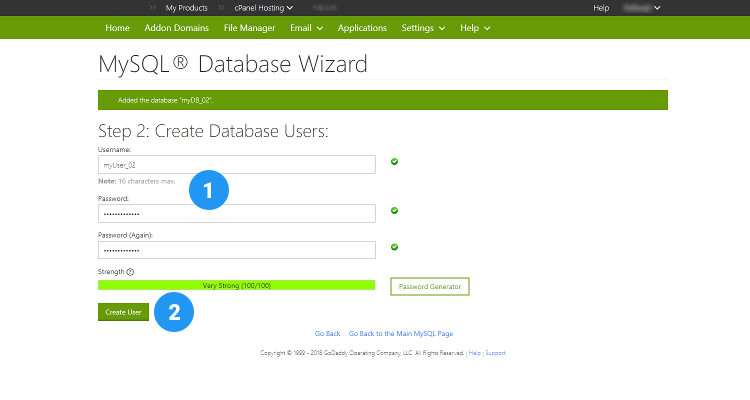
In the following screen, enter a suitable UserName and a password for your Db and click Create User.
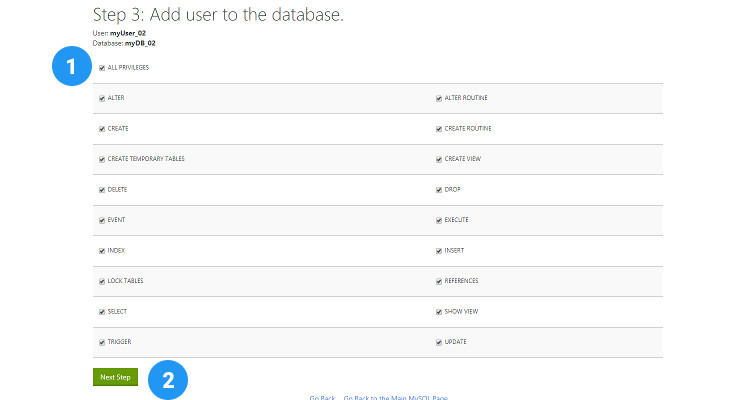
Click ‘All Privileges’ to assign all database management rights to this user in ‘Add User to Database’ section. Alternately, for security purposes, you can assign minimum privileges like Create, Insert, Update, Select, Delete just enough to manage your db.
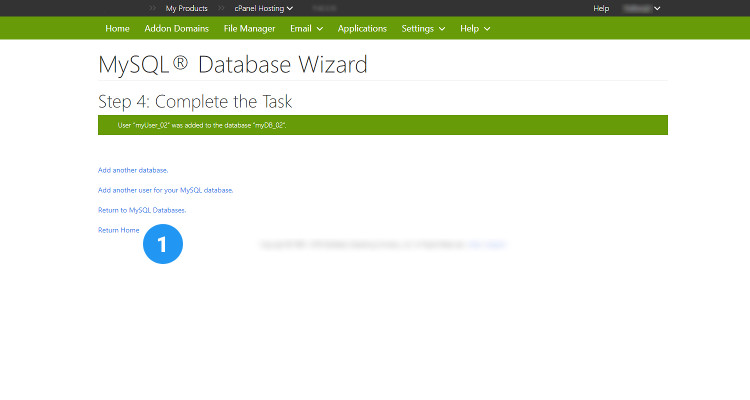
The Database has now been created, click on Return Home to go back to the cPanel Home window.
Where do we see the Database?
Now that we have created our Database, where do we see the Database we just created ?
In the cPanel Home window, under Databases, click on MySQL Databases (same as in Fig 03 in Step by Step method).
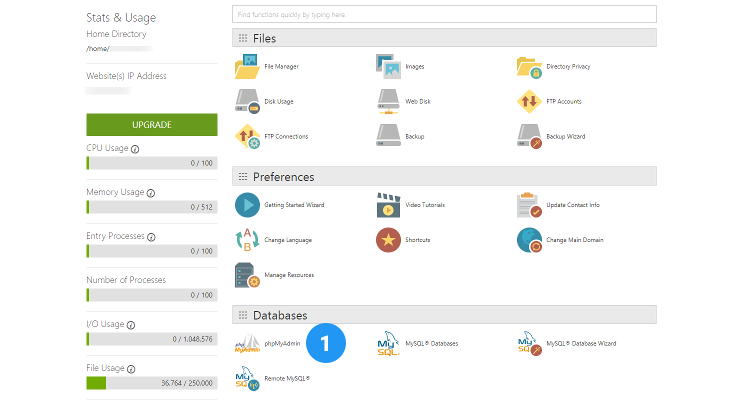
Click on phpMyAdmin listed in the Databases section in the cPanel Home window.
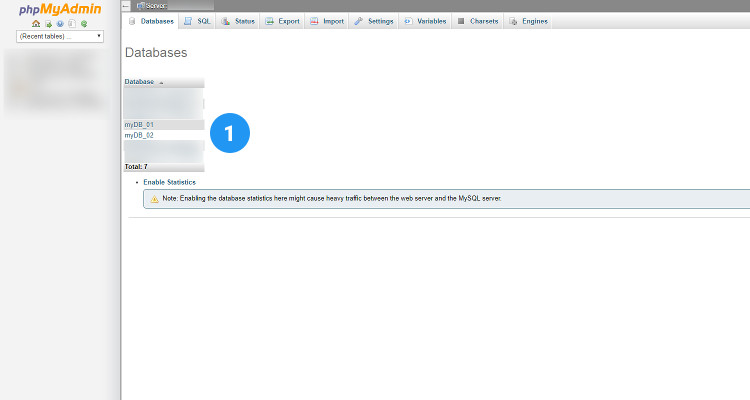
In the phpMyAdmin click on the Databases tab at the top and here you can see the list of all the Databases that you have created.
Please follow our Blog on Feedly for all the latest information. If you need more help, please call our Support Department at (480) 624-2500. We are available 24/7. You can also use our Email support system for any queries. Just IT Hosting

