How to add social media links and seo meta tags using Website Builder
In this article we will see how to complete our website. We will see how to add our social media links, add seo meta tags to our pages, add verification tags to our website and finally take a backup.
In the past few articles we learnt how to change site wide settings and edit web pages.
Social
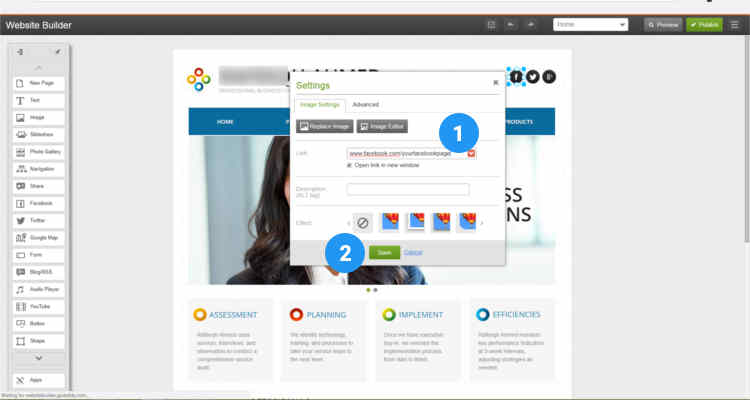
First let’s add social media links to our website. Click on the facebook icon and click on the Settings icon. Under ‘Image Settings’ tab enter the link to your social media page. Place a checkmark on ‘Open link in new window’ so you do not send your visitors away from your website. Similarly you can enter the links to other available social pages.
SEO meta tags
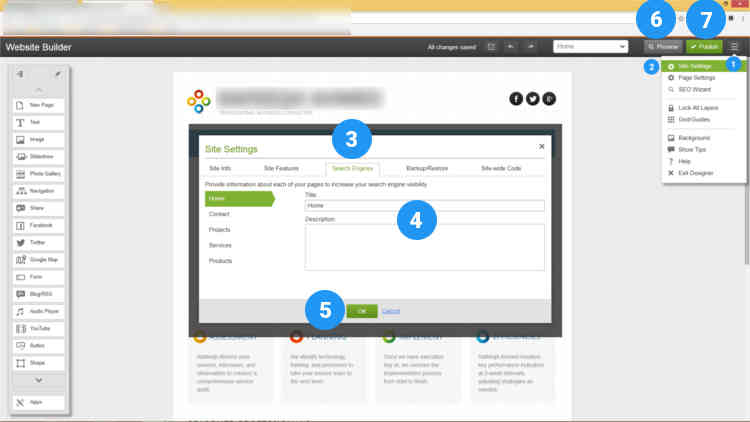
In the Website Builder editor page, click on the Sandwich icon on the top right corner and click on Site settings. In the ‘Site Settings’ window click on ‘Search Engines’ tab. Enter your previously optimized SEO title and description for all your pages. You can find optimized keywords for your web page content using Google Adwords. You can use the ‘Keywords Planner’ under Tools to find efficient keywords for your content. Once you have zoomed in on the keywords make sure to use them in the Title, in the Description, in your content and in your url’s.
Site almost complete
At this point we have almost completed building our website. Click on the ‘Preview’ button in the menu bar to see your website (all the changes made so far not live yet). If you are happy with the way you have built your own website click on the ‘Publish’ button. You have now made your website ‘go online’ for all audiences around the globe.
Domain Settings
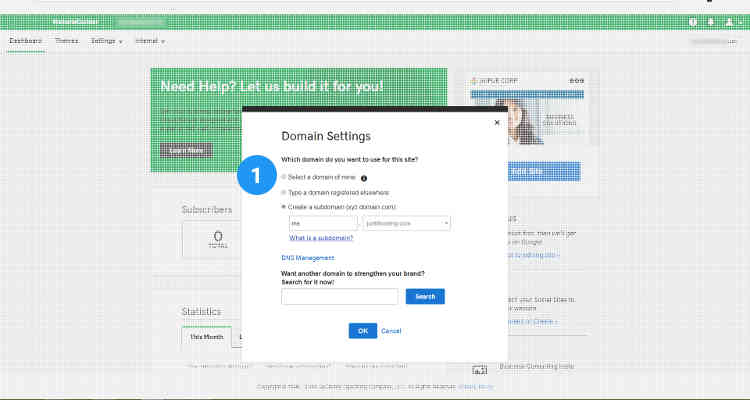
The ‘Domain settings’ option which is available under ‘Settings’ in the Website Builder dashboard helps you publish your website with a Domain name that you have registered with us or another provider or as a sub-domain of an existing domain name.
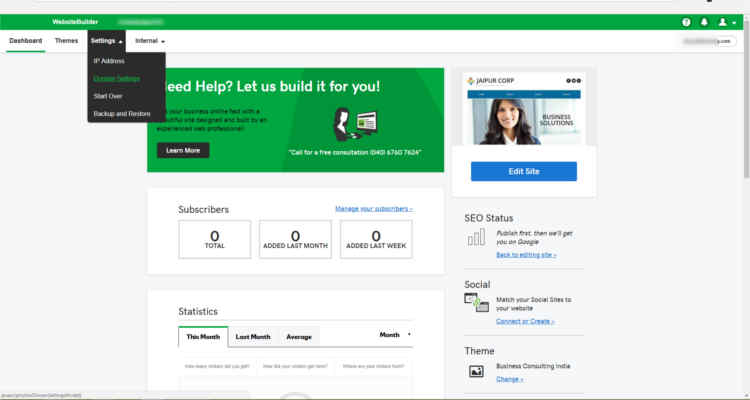
The ‘Domain settings’ window lists all the available options
IP Address
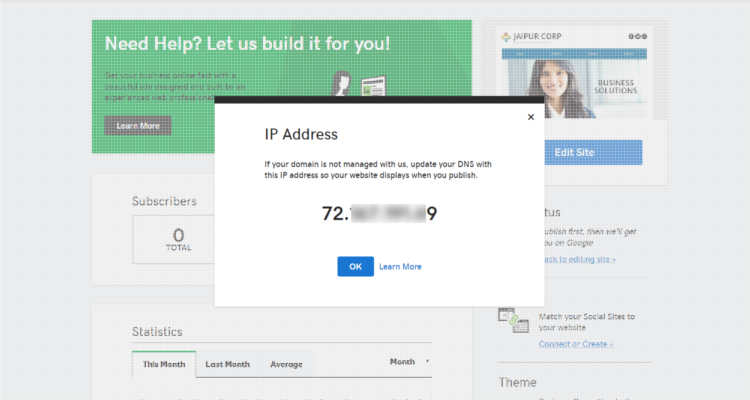
If you have a Domain name registered with another provider or if you have your Domain name servers elsewhere then you need to be able to provide the IP address of your hosting server so that your website is resolvable by public DNS servers.
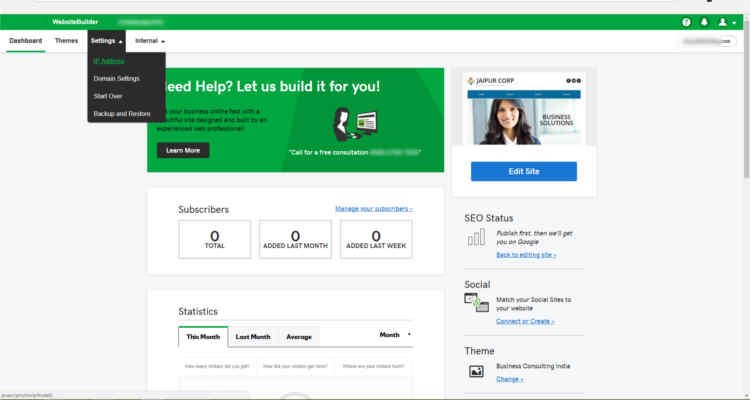
Click on IP address under ‘Settings’ menu in the Website Builder dashboard.
Here you can note down the IP address of your server.
Verification
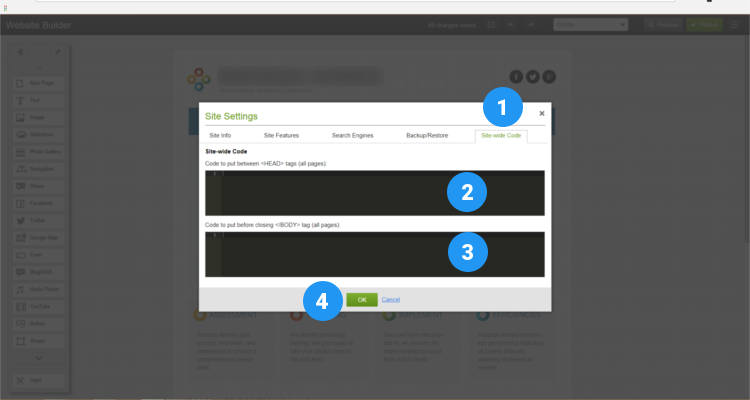
Now that our website is live on the Internet we need to add verification tags from popular search engines like Google, Bing and Yandex. You can also add Google Analytics code to your website which provides useful information about how visitors interact on your website.
Back in the ‘Site Settings’ window (Refer Fig. 02 above) click on Site-wide code. In the HEAD tag section you can add all the verification tags. And in the BODY tag section you can add Google Analytics code.
BackUp & Restore
NO website is complete without a backup. Work smart!!! to build a website using our website builder and hope to lose your website and all its content without a proper backup.
If you have built your website using the step by step procedure we have been discussing in these past few articles, you will not lose your website, your theme, your content, your images, and the code & scripts from external sources.
Back in the ‘Site Settings’ window (Refer Fig. 02 above) click on Backup/Restore tab. Click ‘Create a Backup’.
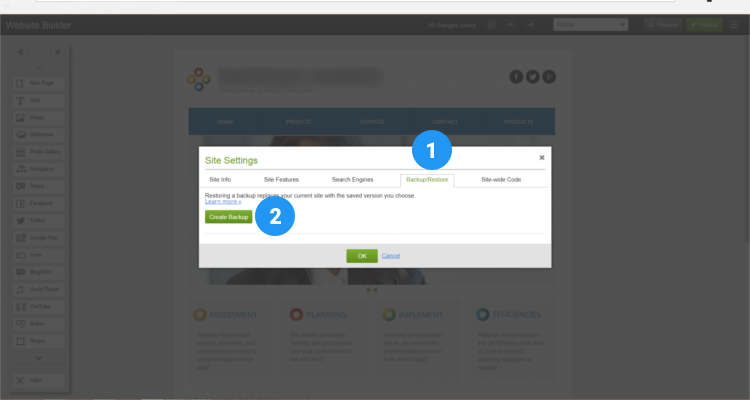
All the Backups are listed in this window. In case of any eventuality just hit the ‘Restore Backup’ button.
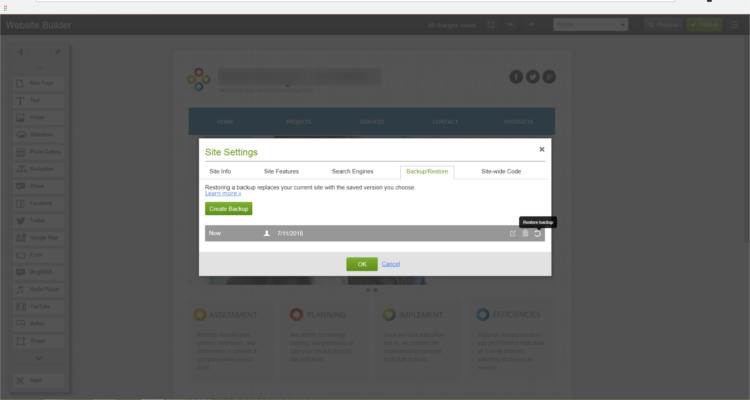
Since this is only a static website you don’t need to take regular backups. Just don’t forget to take a backup whenever you perform any changes to your website.
Please follow our Blog on Feedly for all the latest information. If you need more help, please call our Support Department at (480) 624-2500. We are available 24/7. You can also use our Email support system for any queries. Just IT Hosting

