
Email Marketing – How to Configure WordPress Newsletter Widget for FrontEnd display
Now that we have installed and configured our WordPress Email Marketing plugin, let’s now display the Signup form using a simple wordpress newsletter widget.
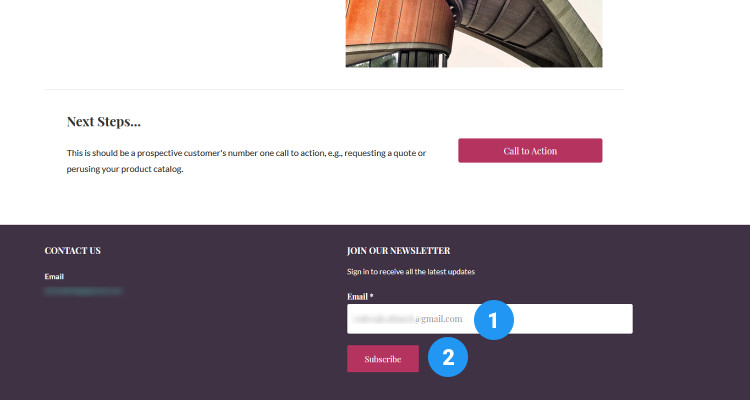
In this article, let’s display the newsletter subscription form in the Website footer.
Log into your WordPress Admin dashboard, just use the format, www.yourDomain.com/wp-admin. If you are already logged in, please ignore this step.
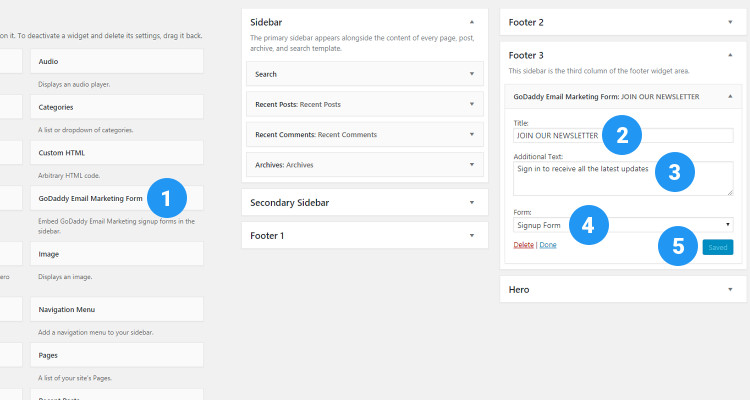
Click on Appearance – Widgets
Drag and drop the ‘GoDaddy Email Marketing form’ from the widgets list into the Footer 3 position.
Enter an appropriate title and additional text for this form. Under Forms drop down list select the Signup form we created in the article ‘Create an Email List and Newsletter Signup Form‘. If you had not properly configured the username and API keys in the Install and Configure WordPress Newsletter Plugin step your Signup forms will not show up in this widget.
Depending on your theme, the signup form shows up on the frontend of your theme. Observe that the widget has adopted to the fonts and colors of the theme without any css configurations.
A visitor or a customer of your website who wants to stay connected enters his email address and clicks on the Subscribe button.
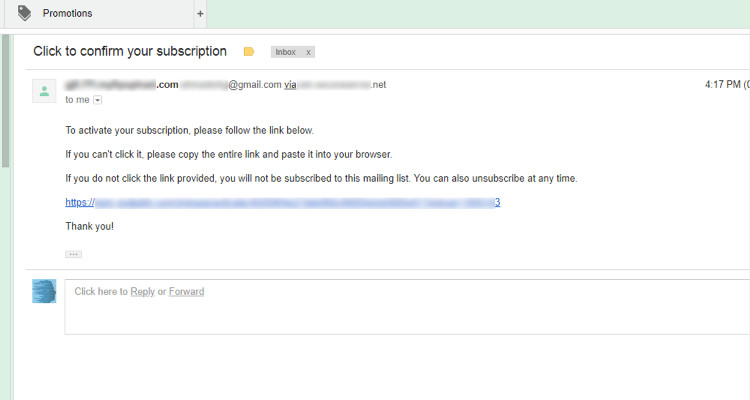
The customer then checks his email and clicks on a link to activate his subscription. This is called Double opt-in. The customer first enters his email address and then clicks on a link. This is a much more better and secure option. Only people who are really interested, only people who really want to follow you get into the Email subscribers database. You also have the option of Single Opt-in.
See your Email list grow
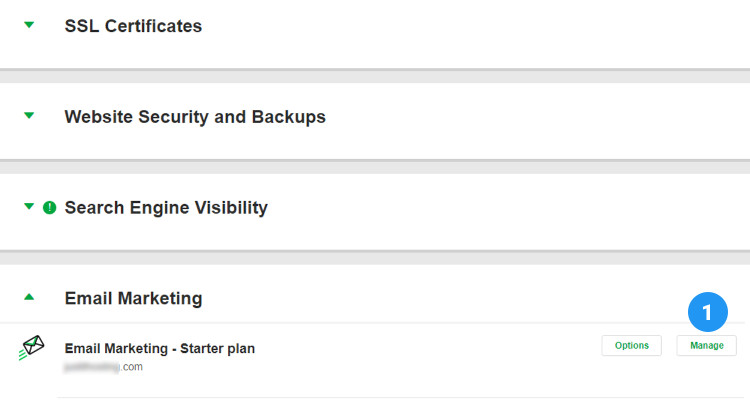
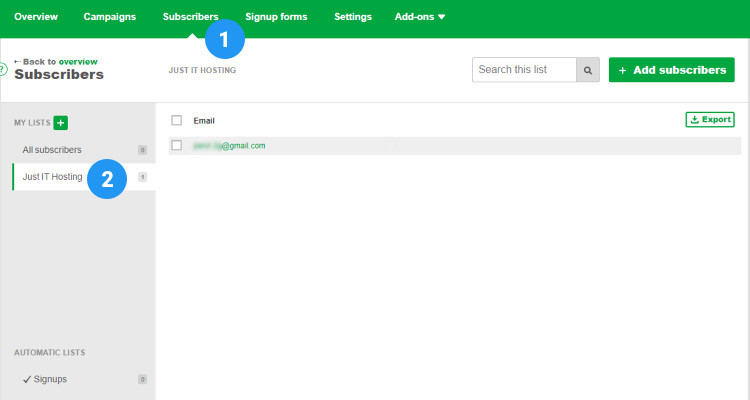
Log back into your JustITHosting My Account.
On the top right hand side under your Account name click on My Products. Under Email Marketing, click on the Manage button next to Email Marketing – starter Plan.
Click on the Subscribers tab and the List you wanted to collect the leads. Here you can see the list of all the email address from your website marketing channel.
You can also add your leads using the Add Subscriber button at the top right corner. Never add any leads that have not agreed to receive emails from you.
Now that we have a list of subscribers lets start promoting our brand and products by creating an email campaign.
Please follow our Blog on Feedly for all the latest information. If you need more help, please call our Support Department at (480) 624-2500. We are available 24/7. You can also use our Email support system for any queries. Just IT Hosting.
You overlooked something!|