How to add a Dedicated IP address
In Shared Hosting, a single IP address is shared by hundreds and even thousands of Web Hosting accounts. If one of them is a spammer and if this IP address is penalised by Search engines or ISP’s it drastically affects the performance of all the other hosting accounts as well. With a Dedicated IP address, your web server is bound to a unique IP address and hence not associated with all the problems of a Shared Hosting account.
Advantages of Dedicated IP address:
Direct Access – When you change your Shared IP address to Dedicated IP address, the changes in the DNS host records or DNS nameservers takes 24-48 hours for propagation. Under such circumstances you can directly access your website using the new IP address and start building your website.
SSL Certificate – Since SSL Certificates securely encrypts Personal or Payment information it needs a Dedicated IP address for normal functioning of a website.
Secure – Web Hosts with Dedicated IP address are more secure
SEO – Dedicated IP address help in Search Engine rankings since your Domain name is not sharing the same IP address with other hundreds of domains.
Steps
In this article, we will see how to purchase and install a IP address on your existing web server. This article will be part of our Install SSL Certificate on cPanel Hosting control panel
When you purchase an SSL certificate from us, you will also receive the Dedicated IP address. When you apply the SSL to the hosting account, we assign the new Dedicated IP to the server. Only perform the following steps if you want to install a 3rd Party SSL certificate.
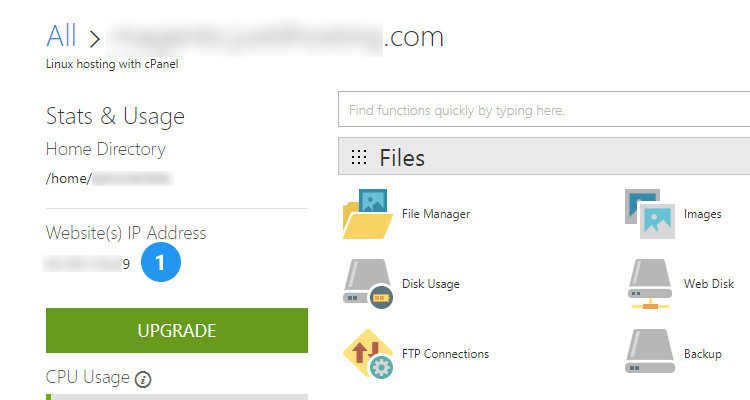
- Log into your JustITHosting My Account. On the top right hand side under your Account name click on My Products. In the Web Hosting section look for your hosting account and click on Manage (Refer Fig. 03). In the next screen click on the cPanel Admin button this will take you directly to your cPanel hosting control panel. In the cPanel Home page window on the left hand side just under Stats & Usage you can see the Website IP Address
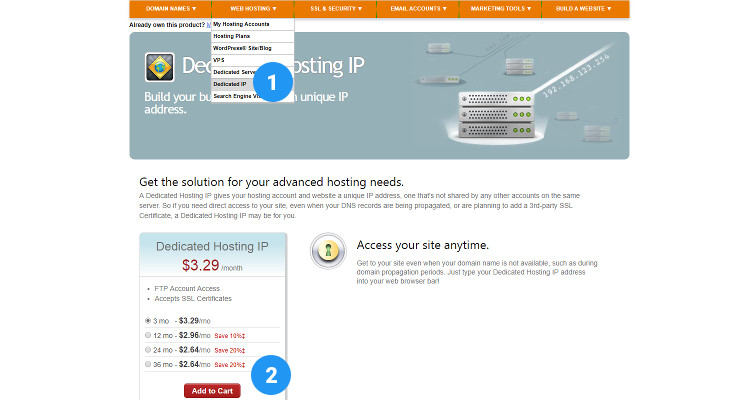
- Purchase a Dedicated IP address. In the menu bar, under Web hosting, click on IP address.
Select the Number of months and click Add to Cart Button. The Cart menu shows the list of all the items purchased just go ahead with the Checkout process.
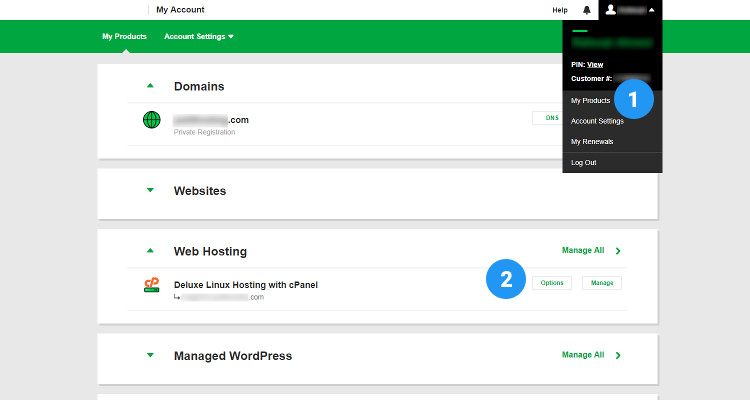
- Apply the new IP address on your web server. Log in to your JustITHosting My Account.
On the top right hand side under your Account name click on My Products. In the Web Hosting section look for your hosting account and click on Options button.
From the Customize tab, apply the Dedicated IP credit that you already have. The DNS propagation of the new IP address takes 24-48 hours before it becomes active.
How to manually change ‘A’ Host record
You can also manually change ‘A’ host records of your Domain name in the DNS manager.
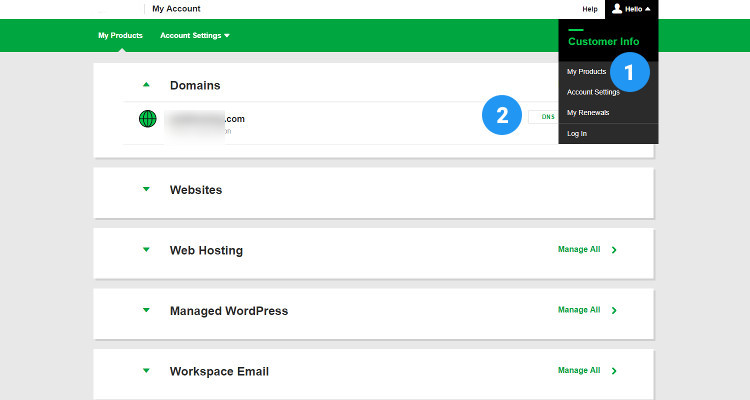
Log in to your JustITHosting My Account. On the top right hand side under your Account name click on My Products.
In the Domains section next to your Domain name, click on the DNS button
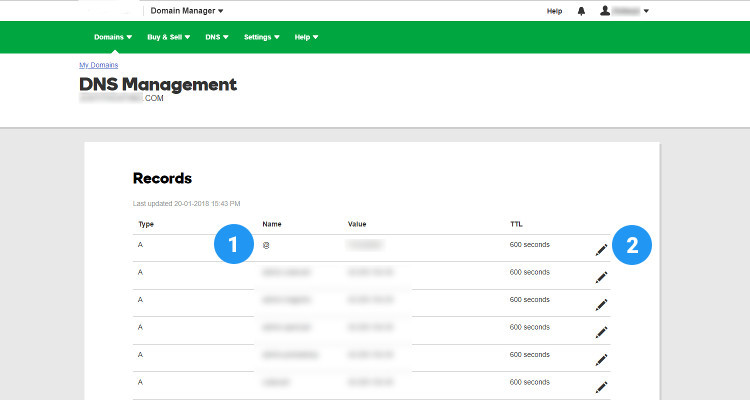
In the DNS Management window, look for the @ ‘A’ host record. Click on Edit
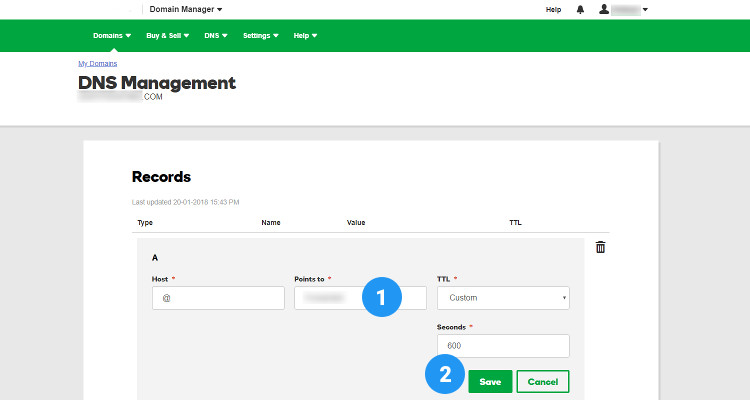
Enter the new IP address in the ‘Points to’ field and click on Save.
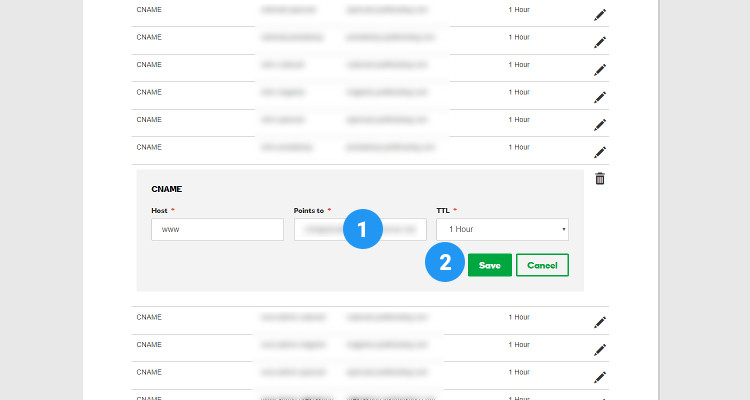
Also, look for the www ‘CNAME’ record, enter @ in the ‘Points to’ field and click on Save.
You can run the following commands every ½ hour in the command prompt (Start – Run – CMD), to check if the new IP address has taken effect.
Ipconfig /flushdns
Ping yourDomain.com
Please follow our Blog on Feedly for all the latest information. If you need more help, please call our Support Department at (480) 624-2500. We are available 24/7. You can also use our Email support system for any queries. Just IT Hosting.

