How to configure Sales Tax – How to start your own Online Store
Most countries in the world have a tax regime to pay for Government and Public expenditures. It is a compulsory charge levied by the Government on an Individual or an Organisation. Failure to comply with this requirement is punishable by law. As an eCommerce store owner please ensure that you comply with your local tax laws. As for your online store is concerned, you can choose to include the taxes in the prices of your products or calculate them separately and in doing so, you can also choose to display the taxes in the product catalog or not.
How to set Product Tax rates for Ecommerce
We will in this article show you step by step how to create tax rates and assign them to Products.

Total Time Needed :
30
Minutes
Total Cost:
0
USD
Required Tools:
Things Needed?
How to create Tax Category
In the previous article on how to start your own online store we saw to how to configure some basic first time setup for your online store. In this article we will see how to configure Sales Tax.
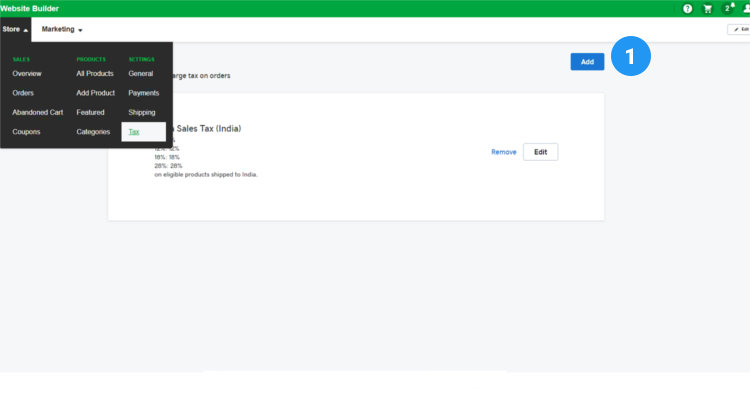
Login to your Just IT Hositng account, if you are already logged in please ignore this step. In the My Products dashboard, under Websites, click on the Manage button next to Website builder Online store. (Refer Fig. 01 – How to start your own Online Store – First Time Setup). In the new window that opens up click on Store – Settings – Tax
Preview of this post on our Facebook fan page
Please Share
For the purposes of this demo, we have already created a Tax profile considering the case of Indian GST, where we have different Tax rates for different products.
If you want to create your own Tax profile, click on the Add button.
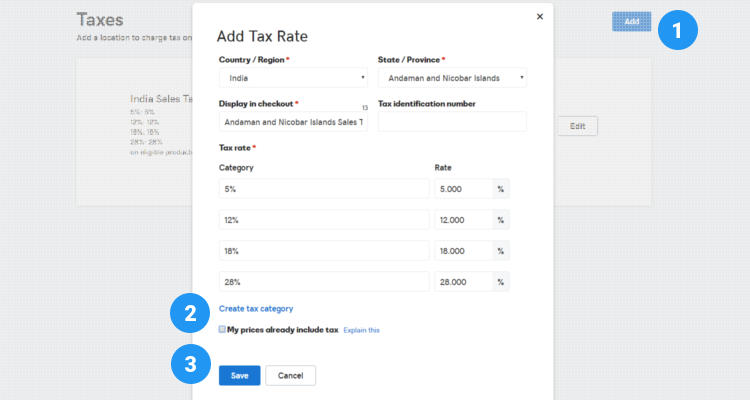
In the ‘Add Tax Rate’ window that opens up, select your Country, State, enter a display name for your Sales Tax and and enter your Tax Identification number(GST number in case of India).
Next click on ‘Create Tax Category’. For easy indentification purposes we have named the Tax category after the Tax rates. Enter the corresponding Tax rates in the appropriate fields. You can choose to include the Tax in the Product price or calculate them separately by unchecking ‘My Prices already include Tax’. Click on Save.
How to set Product Tax Class
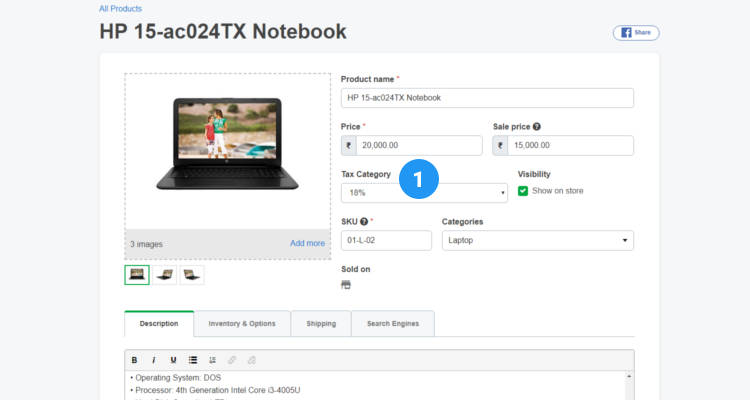
The Sales Tax information you entered in the previous step will be used during the product creation process where you will have to select the Tax category based on the Tax rate of the product. If you have entered all the Tax related information correctly in the previous step, you will not have to look back on this step again. You can choose not to display the taxes in the product catalog and single product page by unchecking ‘Show in Store.’
Display Sales Tax on the StoreFront
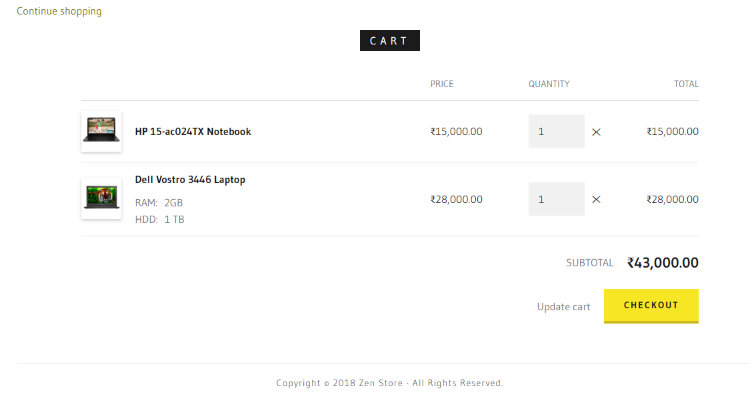
You can see that the Tax rate is not displayed to the customer in the product catalog and in the Shopping cart.
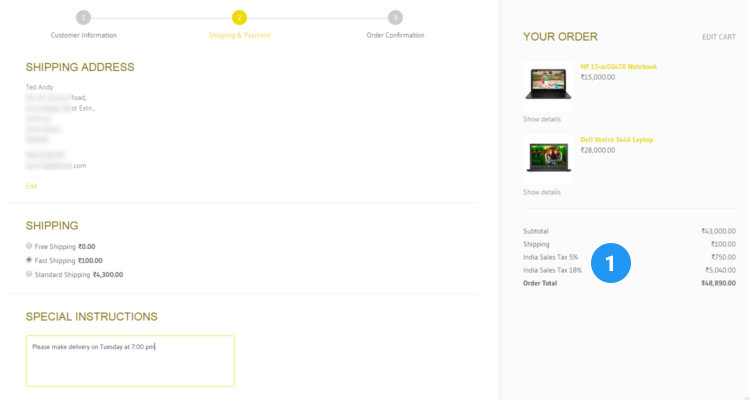
The Tax rates are displayed to the customer during the Checkout process in Step 2 (Shipping & Payments)
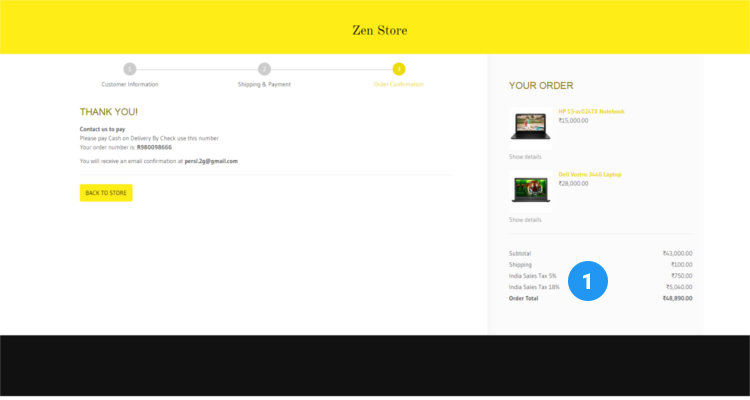
And during Step 3 (Order Confirmation).
Sales Tax FAQ’s
Conclusion
Please follow our Blog on Feedly for all the latest information. Sign up to our Newsletter for free and bookmark our homepage and get all the latest, greatest deals and offers from the world of Web Design, Web Hosting and Domain Names delivered direct to your Email Inbox.
Visit our Shop and you may find the best theme and/or plugin for your next Web Project.
Leave your valuable comments in the form below.

Rafeeqh Ahmed
Ecommerce DeveloperHi, I’m Ahmed. A Tech Enthusiast and like to build simple websites and online stores for Startups, Business Builders and people who want to grow and do business online. I like to write about Content Management Systems, ECommerce Shopping carts, hosting environment in a simple step by step do-it-yourselves fashion so that you do not have to look for HELP. My other interests involve working on Cloud Computing, Virtualization, Windows & Linux Server Operating Systems, Linux Distributions, Networking and SAN Boxes.