How to install Cubecart in cPanel
CubeCart is a free, open source ecommerce shopping cart which can be completely customized to suit your needs.
A variety of extensions are available ranging from payment gateways to shipping to themes which further extend the core functionality.
Cubecart developers also provide direct professional technical support.
Whether you are a retailer looking for an online store or a webmaster seeking an ecommerce solution for a client… CubeCart is the most powerful free ecommerce solution enabling thousands of merchants globally to sell digital or physical products online.
Some popular shops built on Cubecart are
Prism Solar
Perushop24
Cool Buys
Kula Cards
First Choice Mobility
In this article let’s see how to install Cubecart manually on a cPanel web hosting server.
Things needed:
- cPanel link, username and password
- Cubecart zip file
Step 1 – Creating a Database
As with any other eCommerce shopping cart, Cubecart requires a Database to function properly. First create a Database and an associated username using the cPanel. Please note down the Database name, Database username and password. We will use them in the consecutive steps.
Step 2 – Upload the Cubecart Zip file in your cPanel file manager
Next login to cPanel and upload the latest Cubecart zip file in your cPanel(public_html folder). public_html corresponds to your www root folder.
Once the file has been uploaded successfully, right click on it and click ‘extract’. (Refer Fig: 3 in Upload and Install Joomla CMS in your cPanel)
Once all the files have been successfully unzipped, we will use the domain name to install the Cubecart shopping cart and build our online store.
Step 3 – Install Cubecart
Open your favourite web browser and type your Domain name (www.yourDomain.com) in the address bar. You will now see the installation script.
Keep the following things handy:
- A Database name, Database username and Password (already created using Step 1)
- An Email address, Username and password for Cubecart backend administration.
The ‘Compatibility Check’ window performs some basic tests like PHP version and MySQL version to check if the host is compatible with the requirements of Cubecart.
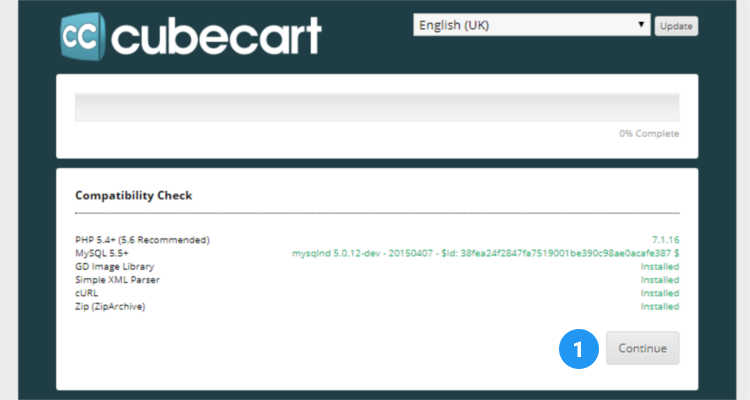
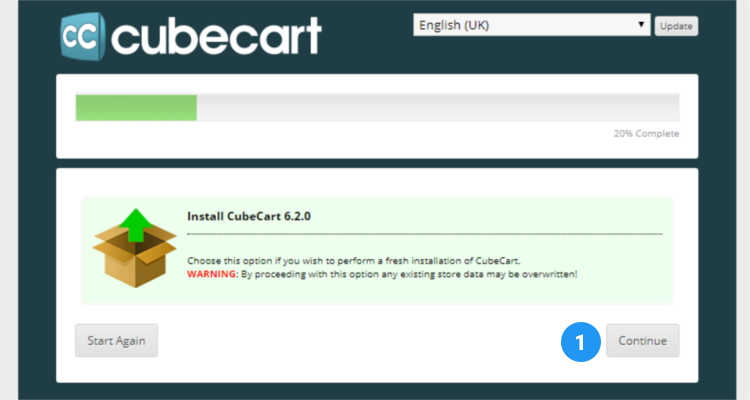
In the ‘Install Cubecart’ window click on the ‘Continue’ button.
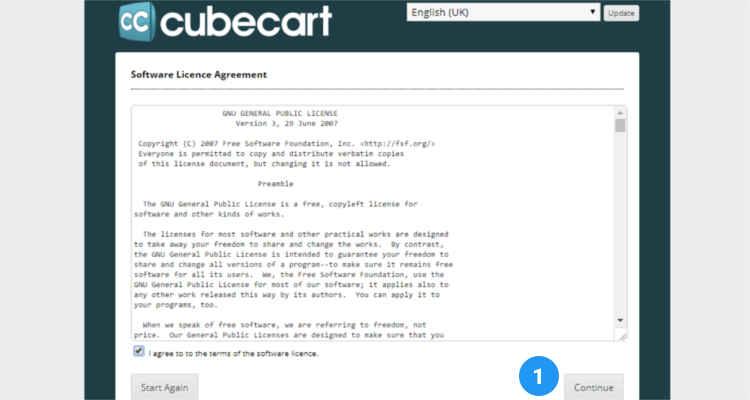
Select “I agree to the terms of the software licence” in the ‘Software Licence Agreement’. Click on the ‘Continue’ button.
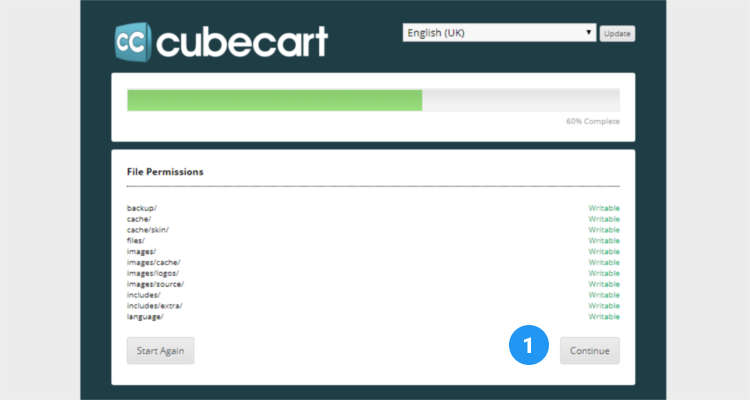
The File Permissions for all the listed folders should be Writable. If everything is green click on the Continue button. If some of the files do not meet the file permission requirements then go into cpanel – file manager and manually change the folder permission to 777 or 766. Once the installation is complete you can reset the permission on these folders to meet the security requirements.
Database and Admin Backend Configuration
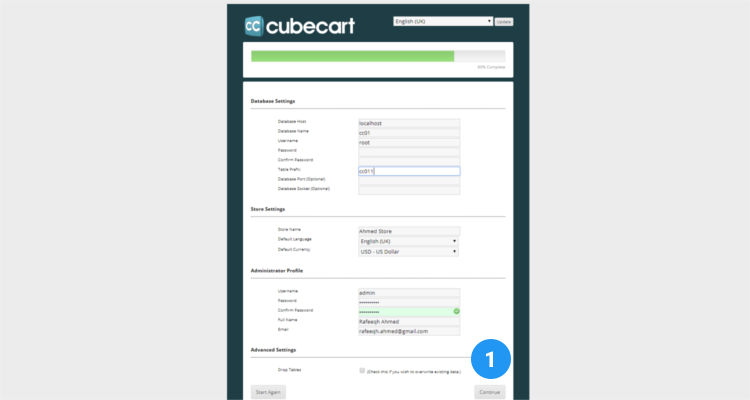
In the next window under ‘Database Settings’ section window enter your database details like
- Database Host
- db Name
- Username (db)
- Password (db)
In the ‘Store Settings’ section enter your store name and select the default language and currency.
In the ‘Administrator Profile’ section enter a username, password and an email address for your Cubecart backend administration. Click on Continue.
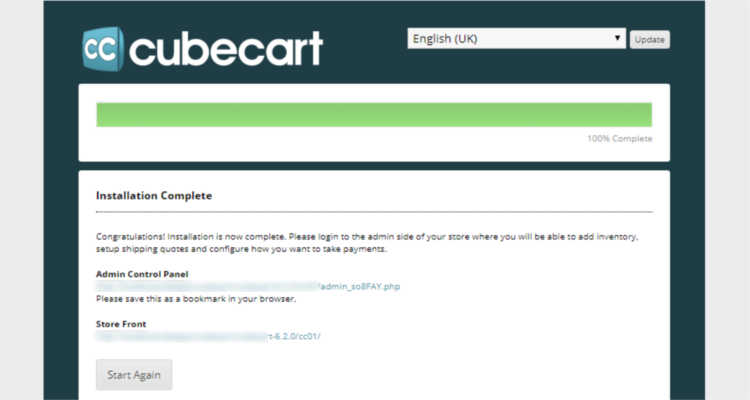
The ‘Installation Complete’ window lists the URL’s to the Admin Control Panel and the Store Front.
Now that we know how to install Cubecart ecommerce shopping cart we will in other articles see how to build an online store based on Cubecart step by step.
Please follow our Blog on Feedly for all the latest information. If you need more help, please call our Support Department at (480) 624-2500. We are available 24/7. You can also use our Email support system for any queries. Just IT Hosting.

