Email Marketing – How to Setup
Even in this age of social marketing, Email Marketing is still one of the oldest and the most economical ways for marketers to connect with their customers. An Email message is five times more likely to be seen and read than a post in Social media network.
We have a great Analytics and reporting tool that shows how many emails were actually opened, read and shared on social media networks like Facebook and Twitter. You can compare emails side by side and see which one’s are working and which one’s are not and focus more on the email promotions that work.
In this series of articles, we will setup an Email marketing campaign using the Just IT Hosting Email Marketing tool and a WordPress website.
Although, Email marketing seems to be a lot complex at first, it’s actually much more simple. Just follow the step by step guide listed below.
| JustITHosting Email Marketing backend | WordPress Admin Backend |
| 01 – Configure Basic Settings | |
| 02 – Create a subscription List | |
| 03 – Create a Sign Up form | |
| 04 – Install Email marketing plugin | |
| 05 – Configure the plugin | |
| 06 – Configure the plugin widget for frontend display | |
| 07 – Capture Subscribers | |
| 08 – Create a campaign – Email | |
| 09 – Create a campaign – RSS Feed |
In this article we will configure all the basic settings in the Email marketing backend to personalize it to your kind of business.
Configure Basic Settings
After you have purchased your favorite Email Marketing Plan log back into your JustITHosting My Account.
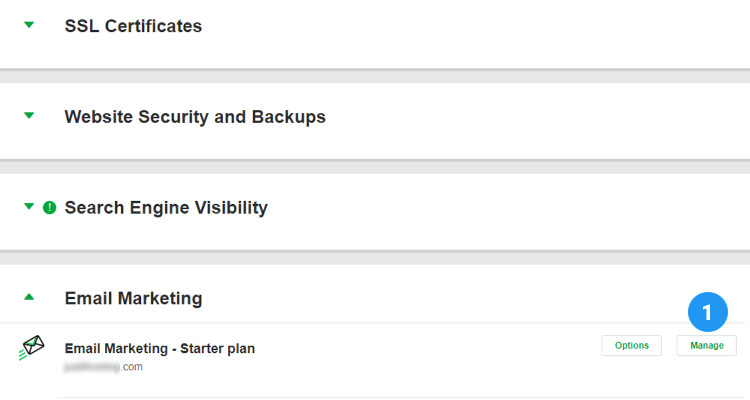
On the top right hand side under your Account name click on My Products. Under Email Marketing, click on the Manage button next to Email Marketing – starter Plan.
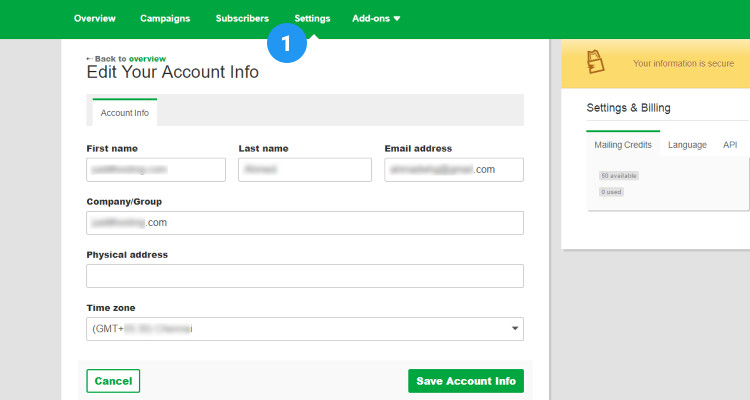
In the next screen, click on the Settings tab. In the ‘Edit your Account Info’ form fill up all the fields like First name, Last name, Email address, Company name, Physical address, Time zone and click on Save Account Info.
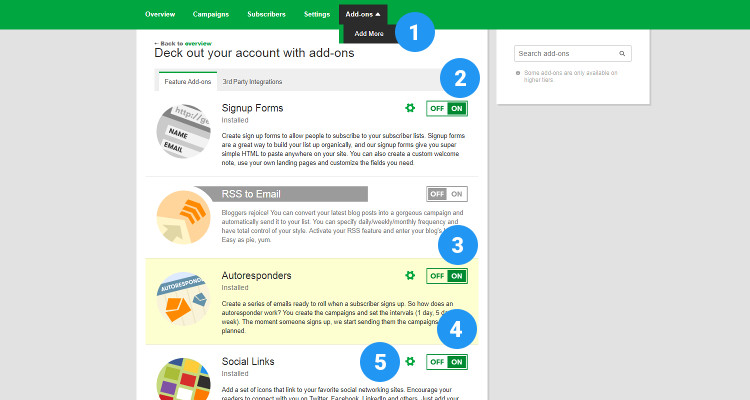
Next press the Add-ons button and click on Add More. Press the ON button next to
Signup forms
Autoresponders
Social Links
Press the Gear symbol next to Social Links.
Add Social Proofs
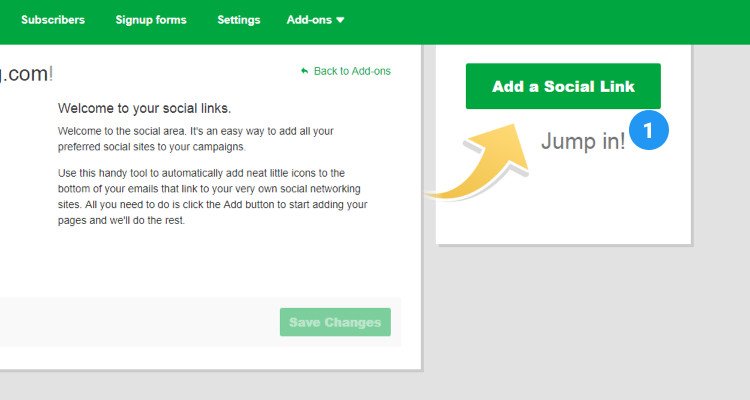
In the next screen click on Add a Social link. In this example, we will just add our Facebook page address.
In the next window, click on the facebook icon.
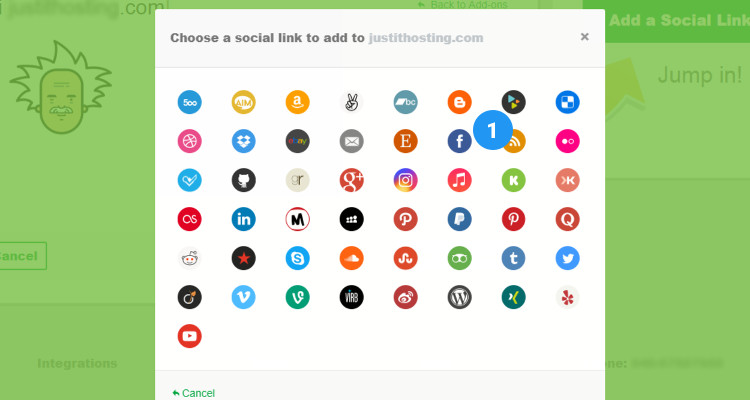
Enter your Facebook page address and click on Save.
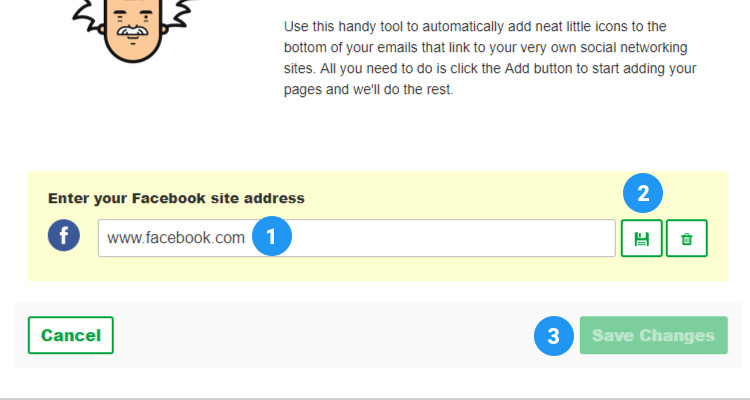
Use the same steps described above to add more social proofs. The more the better. All these Social bookmarks will be displayed in the footer links of your Promotional emails.
Add Personalization Tags
In this example we are just collecting the customer’s email address. You can also collect more details from your customers like first name, last name, phone number, etc., You can then use these information in your emails for customer specific personalization.
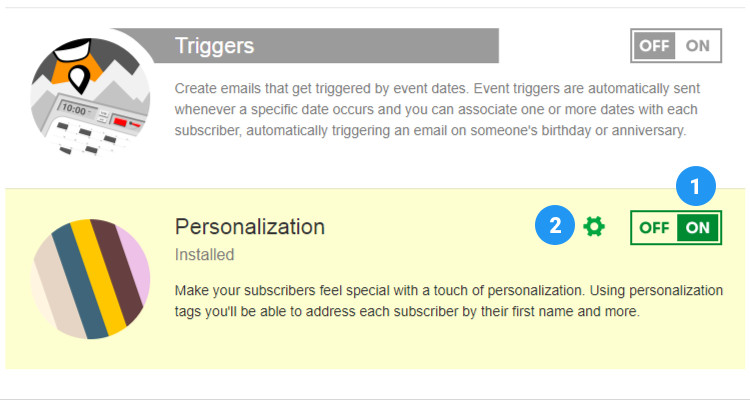
Press the Add-ons button and click Add More (refer Fig: 03 ). Press the ON button next to Personalization and click on the Gear symbol.
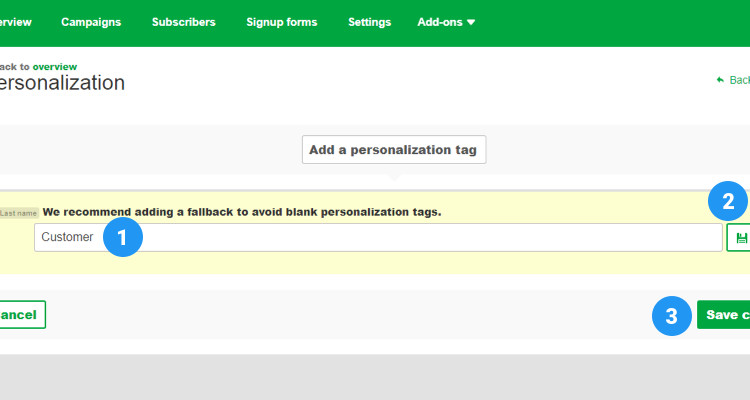
Under Add a Personalization tag click on Last name and click on Save Changes.
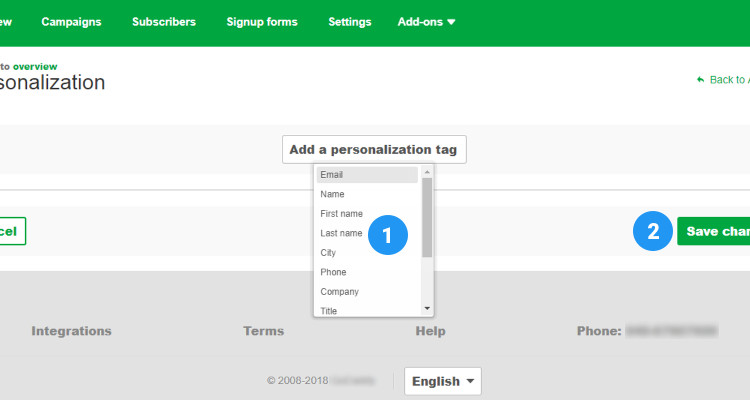
If you have specified the Last name as a non-required field and if the customer forgets/fails to enter the same in the Signup form, you don’t want to leave the “Dear …..,” field empty in your emails,. The next window provides an option for such a case. Just enter a fallback name and click on Save Changes.
Next we will see how to Create a List and Sign Up Form
Please follow our Blog on Feedly for all the latest information. If you need more help, please call our Support Department at (480) 624-2500. We are available 24/7. You can also use our Email support system for any queries. Just IT Hosting.


hello there and thank you for your information – I have certainly picked up something new from right here.
I did however expertise a few technical points using this web site. Well I’m adding this RSS to
my e-mail and can look out for a lot more of your respective fascinating content.
Make sure you update this again very soon.
Terrific post however I was wanting to know if you could write a
litte more on this subject? I’d be very grateful if you could elaborate a little bit further.
Cheers!
My brother recommended I might like this website. He was entirely right.
This post actually made my day. You cann’t imagine
just how much time I had spent for this information! Thanks!
I really like what you guys are usually up too. This type of clever work and coverage!
Keep up the wonderful works guys I’ve you guys to blogroll.