
How to configure Email Client
Now that you know how to send and receive an email using Webmail, in this article we will learn how to configure your Email clients to send and receive Email. Typically an Email client will download messages from your email server to your Desktop, Laptop or Mobile Phone for local use and upload messages to the server for delivery to its recipients.
Any Email client software or device needs the following details for optimum configuration
- EMail server address (usually mail.yourDomain.com)
- Email UserName and Password
- Incoming Server Settings (POP3/IMAP4)
- Outgoing Server Settings (SMTP)
Once you sign up to our Business Email or cPanel Email, you will receive your Email server address in your sign up Email.
Of course, you might have noted down your Email UserName and Password while creating your Email address.
Now in this artice, we will learn how to find the POP3 (incoming email server) / SMTP (outgoing email server) Settings for your Business Email or cPanel Email.
Configure Email Client for Business Email
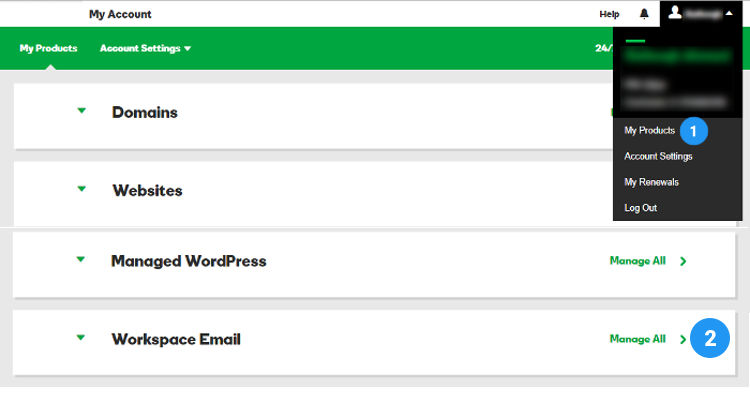
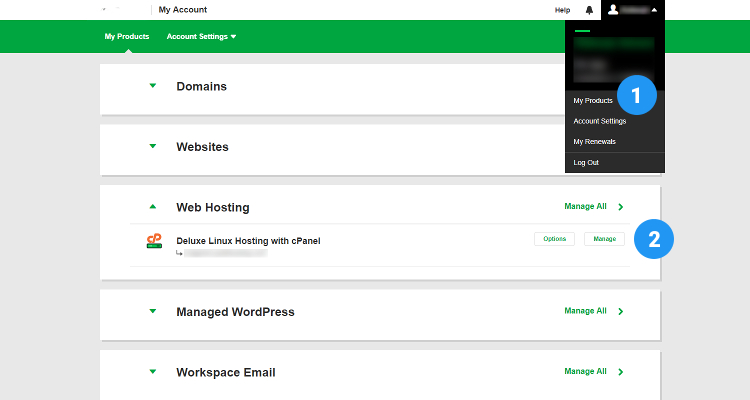
Log in to your Business Email account. On the top right hand side under your Account name click on My Products.
Click on Manage All next to Workspace Email.
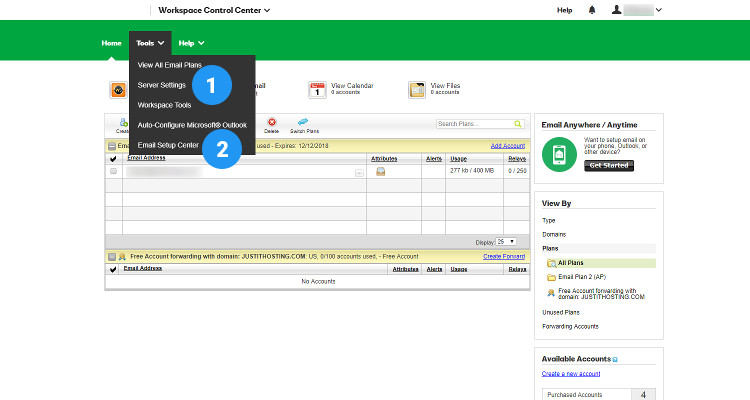
In the next window, click on Tools – Server Settings
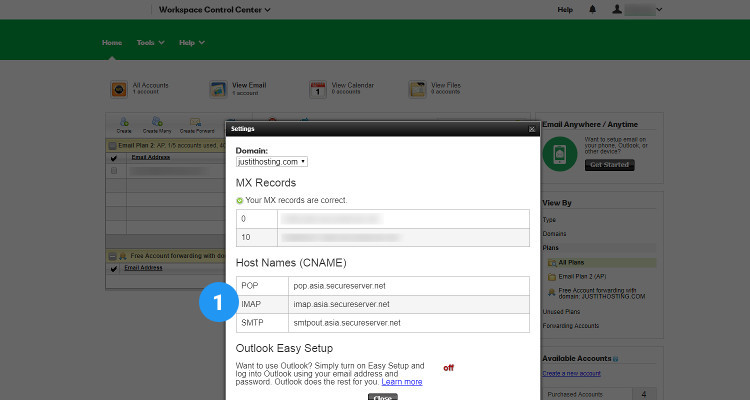
Here you can find the POP/SMTP settings
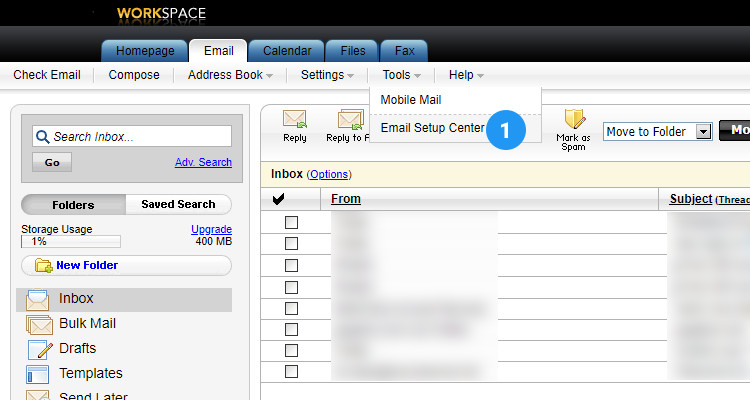
You can also find the POP/SMTP settings from the same window, click on Tools – Email Setup Center
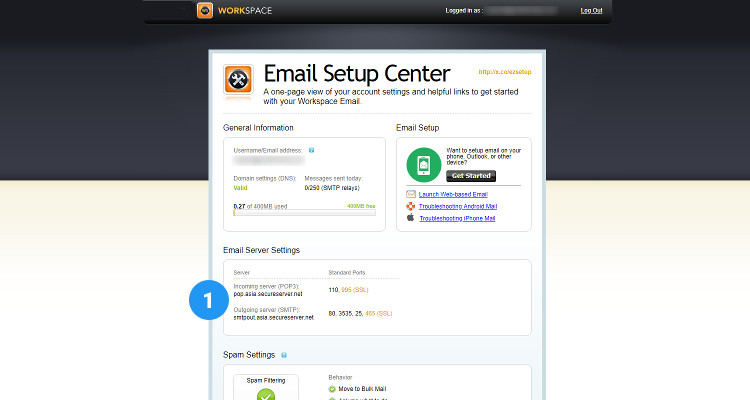
You can also navigate to the Email Setup Center when you are logged into your Business Email account (Email Workspace). Just click on Email tab at the top and under Tools click on Email Setup Center.
Configure Email Client for cPanel Email
After you have got your suitable hosting plan you can log into your hosting account.
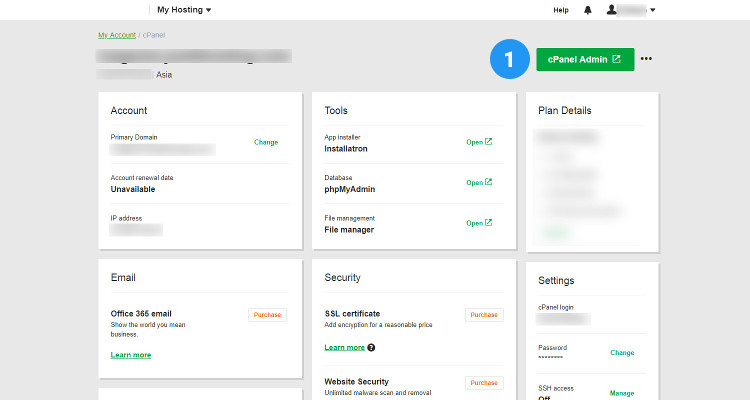
On the top right hand side under your Account name click on My Products. In the Web Hosting section look for your hosting account and click on Manage.
In the next screen click on the cPanel Admin button this will take you directly to your cPanel hosting control panel
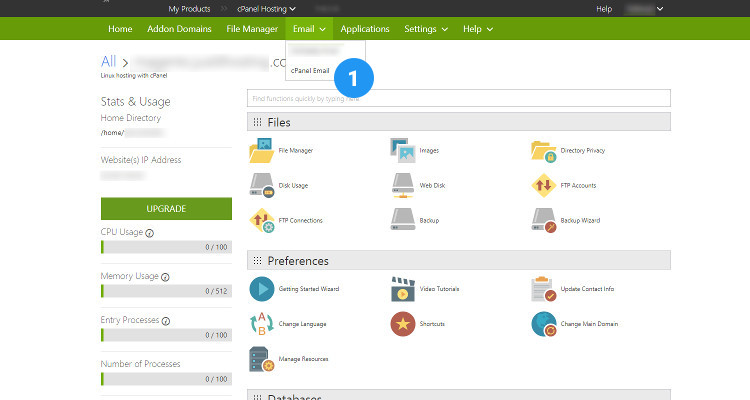
In the cPanel home page, from the header bar, click on Email – cPanel Email
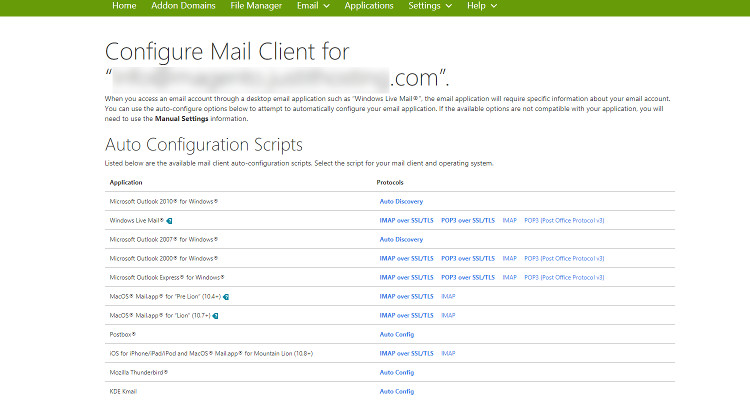
Select the Email address you want to configure and click on the More link. In the new pop up window, click on Configure Email Client.

In the next window, you will see a list of Email client applications and their corresponding protocols. Just click on the protocol link and follow the onscreen instructions.
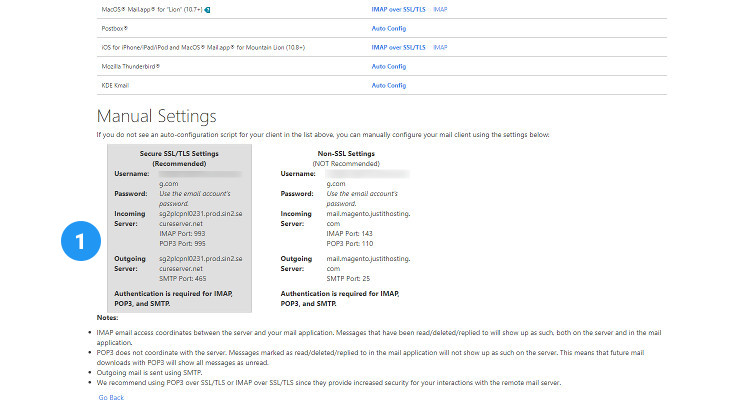
For your convenience, in the same window, under Manual Settings, you will find the POP/SMTP settings.
Here is a list of all the Email port numbers for quick reference.
| Protocol | Secure | non-Secure |
| POP3 | 995 | 110 |
| IMAP | 993 | 143 |
| SMTP | 465 | 25 |
Please follow our Blog on Feedly for all the latest information. If you need more help, please call our Support Department at (480) 624-2500. We are available 24/7. You can also use our Email support system for any queries. Just IT Hosting