
Email Marketing – How to Install and Configure WordPress Newsletter Plugin
Now that we have created a list and a sign up form in our Email Marketing tool, let’s see how to display the signup form on our website.
Of course, JustITHosting and WordPress make things easy. It is assumed that you already have a WordPress website. If not, you can get Managed WordPress Hosting and follow these two articles to setup a working WordPress website.
Managed WordPress Hosting
Managed WordPress Hosting – Get Started
You can either use the Embed code available in your JustITHosting Email Marketing backend or install a simple plugin in the WordPress admin backend.
When you use this plugin to display your Email subscription form on your website frontend, it automatically matches the css styles of your WordPress theme. You do not have to manually match the colors and fonts either on your Email Marketing backend or write additional css codes in your WordPress Admin backend.
Steps
Log into your WordPress Admin dashboard, just use the format, www.yourDomain.com/wp-admin
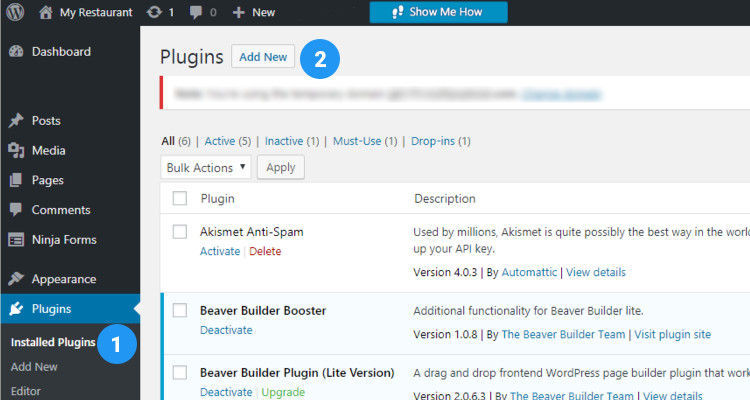
Click on Installed Plugins under Plugins. Check if you already have GoDaddy Email marketing in your plugin list. If not click on Add New and search for this plugin.
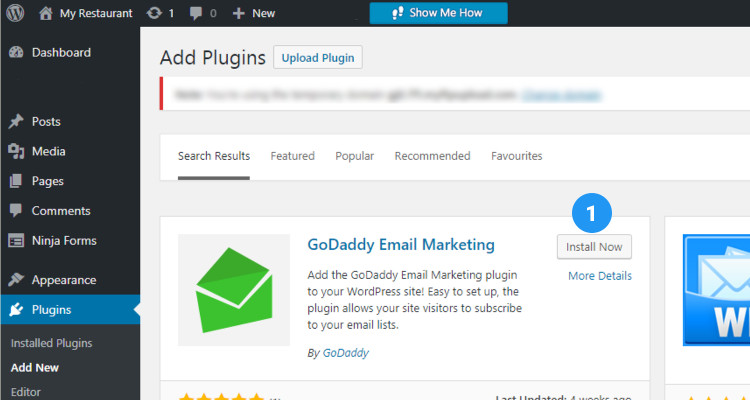
Once the plugin is displayed click on Install Now and click on Activate.
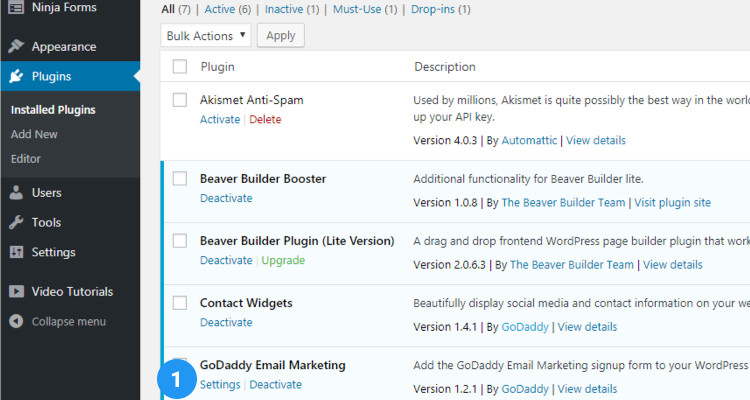
Back in the Installed plugin list click on settings link under GoDaddy Email Marketing.
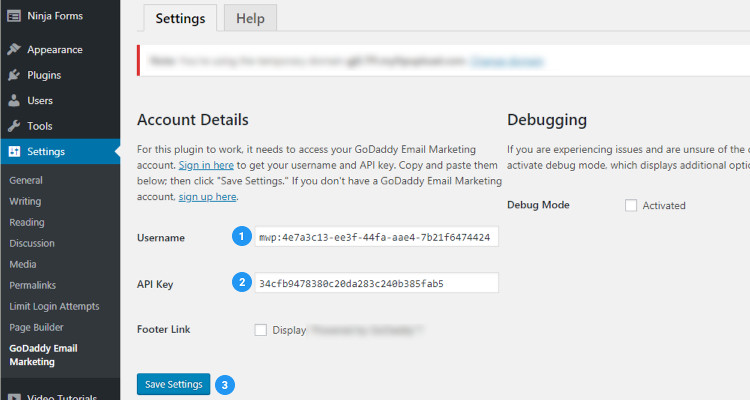
Still in the WordPress admin dashboard, we now need to provide the account details like Username and API key of our account. Let’s see how to grab these details. Just click on the Sign in here link. Enter the Username and password of your JustITHosting Email marketing account.
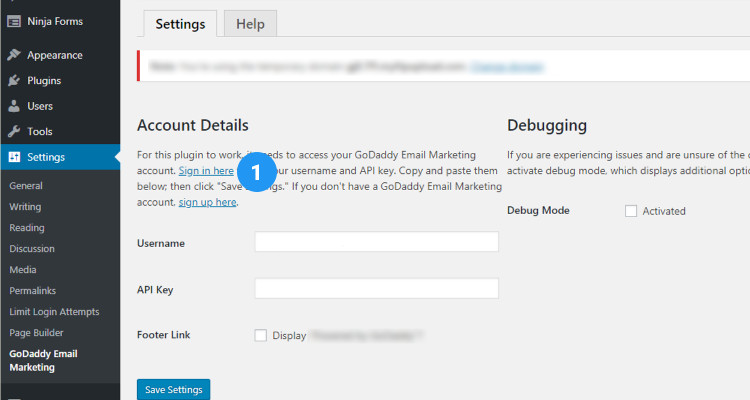
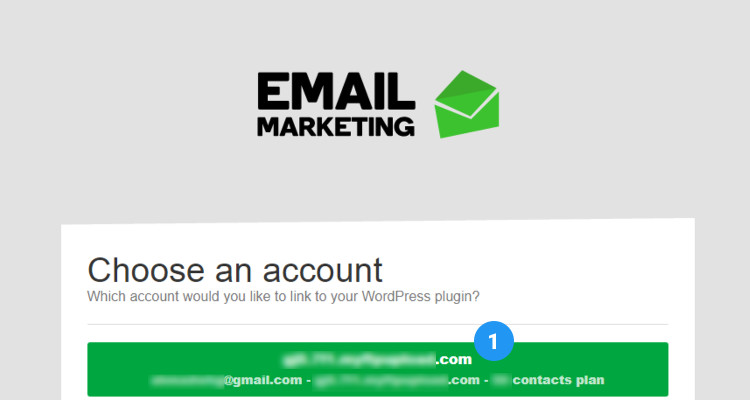
In the next screen, click on the website name to which you want to link this plugin.
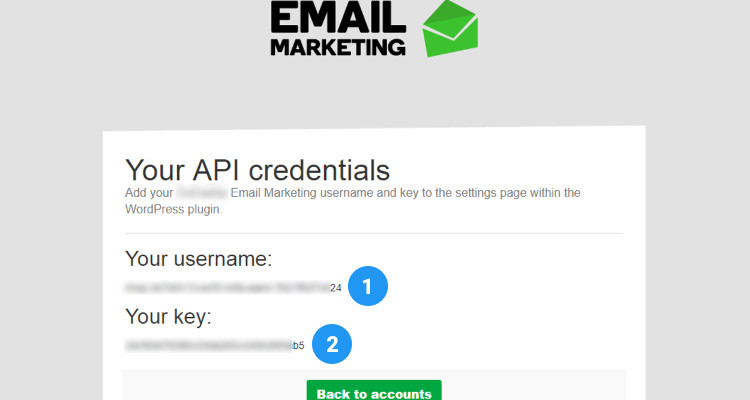
Copy the username and key from the ‘Your API credentials’ window.
Paste the Username and API key in their appropriate places and click on Save settings. This will grab the Sign up form from your JustITHosting Email marketing backend.
Next we will see how to display this sign up form on our website frontend.
Please follow our Blog on Feedly for all the latest information. If you need more help, please call our Support Department at (480) 624-2500. We are available 24/7. You can also use our Email support system for any queries. Just IT Hosting.